
Table of Contents
What you get
- A unique preview URL that you can set that is ready to share with teammates and reviewers
- Real infrastructure in your cloud, created from your project environment deployment settings
- Runtime context variables injected into your app (app ID, environment, run ID, cloud, etc.)
- When a preview is deleted, the Hyphen Agent handles cleanup of cloud resources based on applicable retention policy
Core concepts
Deployment run
A deployment run is the execution of a project environment deployment for a specific revision.
Project environments
Projects group apps, environments, and secrets. Environments (like development and production) isolate config and secrets per lifecycle stage.
Deployment settings
Deployment settings define which apps get deployed, where they run, and how they scale. Each deployment belongs to one project environment. A preview uses that saved configuration with its own name and host prefix.
Prerequisites
- A cloud provider connected to your Hyphen organization
- Ready project container registry and cloud workspace connections for each targeted cloud
- Your app initialized with the CLI (
hx init) and Docker running locally - Project environment deployment settings are configured
A local preview deployment does not require GitHub integration or committed code. Repository workflows need their code and configuration available in the checked-out repository.
Complete the setup by following the Hyphen Deploy Quickstart
Creating a Deployment Preview
Hyphen supports multiple ways to trigger deployment runs.
Option 1: Use the CLI
Hyphen Deployment Previews let you create isolated environments for branches, pull requests, or temporary testing.
Using the CLI, you can:
- Build artifacts associated with a preview (one Docker image per project container registry)
- Deploy that build to a preview environment
- Reuse an existing build for future deployments
Step 1: Build with a Preview Label
Use the --preview flag when building to associate the build with a preview name.
hx build --preview "<preview-name>"
Example
hx build --preview "PR 200"
This command:
- Builds your application
- Uploads artifacts to every ready container registry on the project
- Tags the build with the preview name
📘 **Important **
📘 This step does not create the preview environment yet.
📘 The preview name is stored with the build so it can be used later during deployment.
📘 Builds tagged with a preview can be deployed to your production deployment.
Step 2: Create a Deployment Preview
To create a preview, you must give the preview a name and a host prefix. The prefix is added to the start of the deployment's existing hostname.
hx deploy --env development --preview "PR 200" --prefix pr200
Example preview url would be: https://pr200-my-app.demo.com
This example selects the environment with alternate ID development in the project linked in .hx. To use that project's environment of type development, omit --env. The command creates the preview if the name/prefix pair does not exist, builds and uploads the current local app, and starts the preview run. If you already built the app in step 1, add --no-build as shown below.
Preview names may repeat with different host prefixes. Include --prefix when selecting an existing preview to identify the intended one.
In the dashboard, select the preview and use Copy CLI command in the menu beside Deploy Preview to copy the preview name and host prefix, plus --env when the environment's type isn't development. The organization and project come from your app folder's .hx file — run the command from an app folder whose .hx file links to the project shown in the menu, and keep preview names quoted when they contain spaces or shell punctuation.
Step 3: Reuse an Existing Build
If a build already exists for the preview, you can skip building again using --no-build.
hx deploy --env development --preview "PR 200" --prefix pr200 --no-build
Option 2: In the Hyphen App
To create deployment previews in the Hyphen app:
-
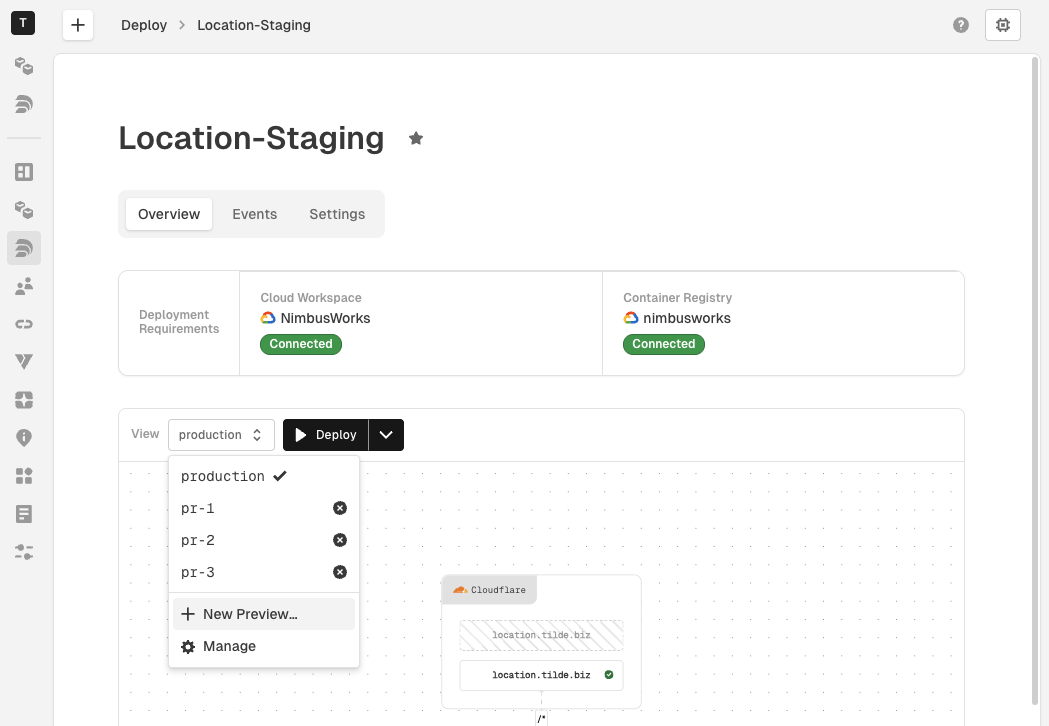
Navigate to Deploy → then choose the deployment you want to create a preview for.
-
Open the preview selector for the environment, then select New Preview...
-
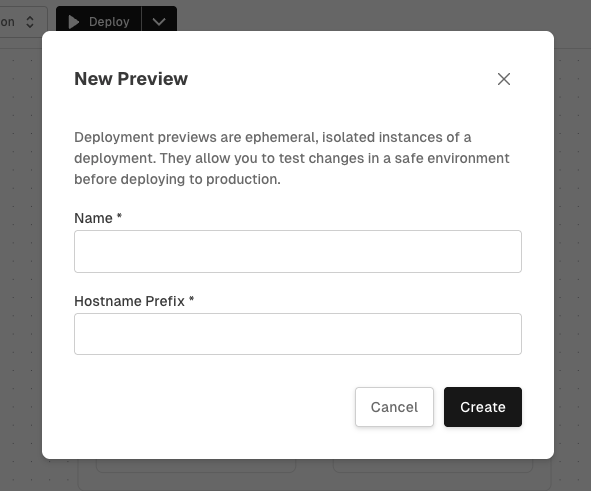
Give your new preview a name and host prefix and select Create
-
Your new preview is selected. To build local code for it, open the menu beside Deploy Preview → Copy CLI command and run it from the initialized app folder.
-
To deploy uploaded builds instead, select Deploy Preview. Complete any missing requirements shown in the setup dialog. When multiple builds are available, Deploy previous build… lets you choose a previous build.